VitePress + Github Pages로 블로그 만들기 - 배포
워크플로우 작성
.github/workflows 폴더를 생성 후 deplay.yml 파일을 생성해 줍니다
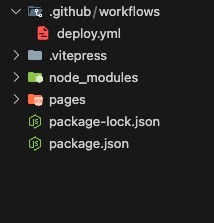
deploy.yml 파일에 공식 문서에 있는 샘플 워크플로우를 복사해서 붙여줍니다.
다만 우리는 공식 문서의 가이드와는 폴더 구조가 다르기 때문에 Upload artifact 설정을 수정해 주어야 합니다.
jobs:
  # 빌드 작업
  build:
    runs-on: ubuntu-latest
    steps:
	  ...
      - name: Upload artifact
        uses: actions/upload-pages-artifact@v3
        with:
          path: .vitepress/dist
          # path: docs/.vitepress/dist
Github 저장소에 소스 코드 올리기
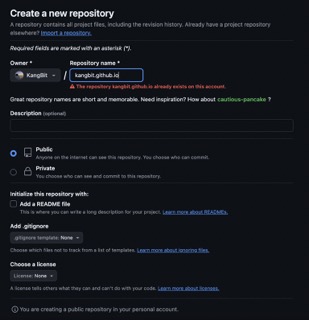
우선 새로운 저장소를 생성해 줍니다.
이 때 저장소의 이름을 {username}.github.io/ 로 해주지 않으면,
블로그의 주소가 https://{username}.github.io/{RepositoryName} 이 됩니다.
주소에 RepositoryName이 포함되게 되면 SEO 설정 시에 어려움이 있을 수 있습니다.
생성된 저장소의 설정을 수정해 줍니다.
이제 터미널을 통해 저장소에 소스 코드를 업로드합니다.
$ git init
$ git add --all
$ git commit -m "first commit"
$ git branch -M main
$ git remote add origin {깃허브 저장소 주소}
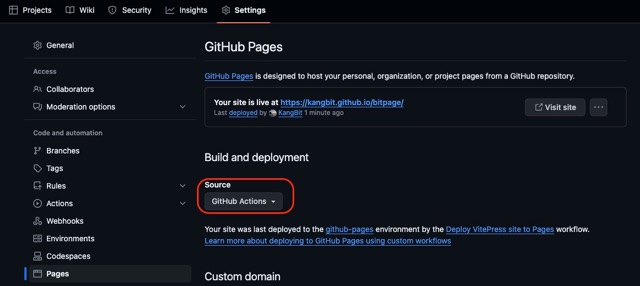
$ git push -u origin main업로드 후에 저장소의 Actions 페이지에 접근해 보면, 배포 상황을 확인할 수 있습니다.

위와 같이 배포가 성공적으로 완료되었다면
https://{username}.github.io/로 접근해서 홈페이지를 확인할 수 있습니다.