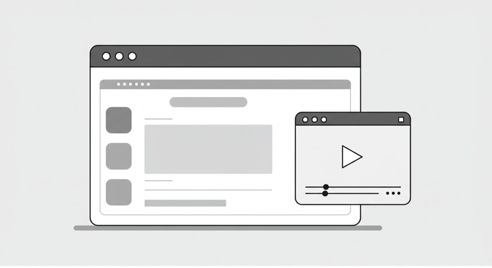
Document Picture In Picture
실험적 기능
Document Picture in Picture API는 아직 실험적 기능입니다. ( 2025-07 )
일부 브라우저에서 동작하지 않을 수 있습니다.
CanIUse 에서 브라우저별 지원 현황을 확인할 수 있습니다.
Secure Context
Secure Context 에서만 사용할 수 있습니다.
Picture In Picture란?

Picture in Picture (PIP)는 사용자가 다른 작업을 수행하면서도 특정 콘텐츠를 계속 볼 수 있도록 도와주는 기능입니다.
기존에는 주로 동영상 재생 시에 활용되어, 사용자가 웹 서핑이나 문서 작업을 하면서도 영상을 계속 시청할 수 있게 해주었습니다. 이 작은 팝업 창은 항상 다른 창들 위에 떠 있어서 필요한 정보를 지속적으로 제공합니다.
Document Picture In Picture
Document PIP API의 등장으로 이제는 웹 문서 전체를 작은 창으로 분리할 수 있게 되었습니다. 이는 단순한 비디오 재생을 넘어서, 채팅창, 대시보드, 문서 편집기 등 다양한 웹 애플리케이션을 독립적인 창으로 분리하여 멀티태스킹을 극대화할 수 있게 해줍니다.
Document PIP의 핵심은 콘텐츠의 완전한 이동과 스타일의 완벽한 복사에 있습니다. 사용자가 보고 있던 화면의 특정 부분을 그대로 PIP 창으로 이동시키고, 모든 스타일시트를 복사하여 원본과 동일한 모습을 유지할 수 있습니다.
PIP 창 열기
브라우저 지원 확인
먼저 브라우저가 Document PIP API를 지원하는지 확인해야 합니다.
const isPipSupported = "documentPictureInPicture" in window;PIP 창 생성하기
API를 지원하는 경우, requestWindow 메서드를 통해 PIP 창을 생성할 수 있습니다.
<div id="container">
  <button id="toggle-pip">Toggle PiP</button>
</div>const container = document.getElementById("container");
const togglePipButton = document.getElementById("toggle-pip");
const isPipSupported = "documentPictureInPicture" in window;
if (!isPipSupported) {
container.innerHTML = "Picture-in-Picture is not supported in this browser";
} else {
togglePipButton.addEventListener("click", openPiP);
togglePipButton.style.display = "block";
}
async function openPip() {
const pipWindow = await window.documentPictureInPicture.requestWindow({
width: 300,
height: 300,
disallowReturnToOpener: true, // '탭으로 돌아가기' 버튼 숨기기
preferInitialWindowPlacement: true, // 항상 초기 위치에 설정 크기로 열림 (Chrome 130+)
});
}#toggle-pip {
padding: 10px;
border: 1px solid #ccc;
border-radius: 10px;
display: none;
}아래 버튼을 클릭해보시면 PIP 창이 어떻게 나타나는지 직접 확인할 수 있습니다.
PIP 창 제어하기
PIP 창 닫기
PIP 창을 닫기 위해서 반환받은 pipWindow 객체를 이용하거나 documentPictureInPicture 객체를 통해 접근합니다.
// 방법 1: 반환받은 pipWindow 이용
pipWindow.close();

// 방법 2: documentPictureInPicture window 이용
if (window.documentPictureInPicture.window) {
  window.documentPictureInPicture.window.close();
}
토글 기능 구현
PIP 창을 열고 닫는 토글 기능을 구현해보겠습니다.
<div id="container">
  <button id="toggle-pip">Toggle PiP</button>
</div>// ...
if (!isPipSupported) {
container.innerHTML = "Picture-in-Picture is not supported in this browser";
} else {
togglePipButton.addEventListener("click", togglePictureInPicture);
togglePipButton.style.display = "block";
}
function togglePictureInPicture() {
if (window.documentPictureInPicture.window) {
closePip();
} else {
openPip();
}
}
async function openPip() {
const pipWindow = await window.documentPictureInPicture.requestWindow({
width: 300,
height: 300,
disallowReturnToOpener: true,
preferInitialWindowPlacement: true,
});
}
function closePip() {
window.documentPictureInPicture.window.close();
} 이제 아래 버튼을 클릭하면 PIP 창을 열고 닫을 수 있습니다.
콘텐츠를 PIP 창에 표시하기
기본적인 콘텐츠 추가
가장 간단한 방법은 PIP 창에 직접 HTML 코드를 작성하는 것입니다.
pipWindow.document.body.innerHTML = `
  <h1>Hello, PIP!</h1>
`;
하지만 실제 사용 사례에서는 사용자가 보고 있던 특정 부분을 PIP 창으로 이동시키는 것이 일반적입니다.
기존 요소를 PIP 창으로 이동
이를 통해 원본 페이지에서 보고 있던 영역을 PIP 창에서 볼 수 있습니다.
<div id="container">
  <button id="toggle-pip">Toggle PiP</button>
</div>
<div id="pip-container">
  <div id="pip-content" class="pip-content">
    <h1>Hello, PIP!</h1>
  </div>
</div>const container = document.getElementById("container");
const pipContent = document.getElementById("pip-content");
async function openPip() {
const pipWindow = await window.documentPictureInPicture.requestWindow({
width: 300,
height: 300,
disallowReturnToOpener: true,
preferInitialWindowPlacement: true,
});
pipWindow.document.body.append(pipContent);
}PIP 창 닫힐 때 콘텐츠 복원
PIP 창이 닫힐 때는 콘텐츠를 원래 위치로 복귀시켜야 합니다.
pagehide 이벤트를 활용해서 요소를 다시 원래 위치로 가져옵니다.
const container = document.getElementById("container");
const pipContent = document.getElementById("pip-content");

async function openPip() {
  const pipWindow = await window.documentPictureInPicture.requestWindow({
    // ...
  });

  pipWindow.addEventListener("pagehide", onClosePip);
  pipWindow.document.body.append(pipContent);
}

function onClosePip(event) {
  container.append(event.target.querySelector("#pip-content"));
}.pip-content {
color: yellow;
padding: 20px;
background: #333;
border-radius: 8px;
}이제 요소가 적절하게 이동하고 복원됩니다.
하지만 아직 스타일이 PIP 창에 적용되지 않아 콘텐츠가 제대로 표시되지 않는 것을 확인할 수 있습니다.
스타일을 PIP 창에 적용하기
모든 스타일을 PIP 창에 복사하기
PIP 창에서 콘텐츠가 원본과 동일하게 보이려면 스타일시트를 PIP 창에 복사해야 합니다.
다음과 같은 방법으로 모든 스타일을 PIP 창에 복사할 수 있습니다:
async function openPip() {
  const pipWindow = await window.documentPictureInPicture.requestWindow({
    // ...
  });

  //...
  copyStyles(pipWindow);
}

const copyStyles = (pipWindow) => {
  [...document.styleSheets].forEach((styleSheet) => {
    try {
      const cssRules = [...styleSheet.cssRules]
        .map((rule) => rule.cssText)
        .join("");
      const style = document.createElement("style");
      style.textContent = cssRules;
      pipWindow.document.head.appendChild(style);
    } catch (e) {
      const link = document.createElement("link");
      link.rel = "stylesheet";
      link.type = styleSheet.type;
      link.media = styleSheet.media;
      link.href = styleSheet.href;
      pipWindow.document.head.appendChild(link);
    }
  });
};
이 코드는 다음과 같은 작업을 수행합니다:
- 모든 스타일시트 순회:
document.styleSheets를 통해 페이지의 모든 스타일시트에 접근 - 내부 스타일시트 처리: CSS 규칙을 추출하여 새로운
<style>태그로 생성 - 외부 스타일시트 처리: CORS 정책으로 인해 접근할 수 없는 외부 CSS 파일은
<link>태그로 복사
이제 PIP 창에서도 원본과 동일한 스타일이 적용됩니다.
Tailwind CSS 적용하기
Tailwind CSS를 사용하고 있다면 모든 스타일을 복사하는 대신 다음과 같이 간단하게 적용할 수 있습니다.
async function openPip() {
  const pipWindow = await window.documentPictureInPicture.requestWindow({
    // ...
  });

  // ...
  setTailwindCSS(pipWindow);
}

function setTailwindCSS(pipWindow) {
  const script = pipWindow.document.createElement("script");
  script.src = "https://cdn.jsdelivr.net/npm/@tailwindcss/browser@4";
  pipWindow.document.head.appendChild(script);
}
PIP에 다른 스타일 적용하기
PIP 창에만 별도의 스타일을 적용하고 싶다면 @media (display-mode: picture-in-picture) 미디어 쿼리를 활용할 수 있습니다.
이 미디어 쿼리는 PIP 창에서만 적용되는 CSS를 지정할 수 있어, 원본 문서와는 다른 레이아웃이나 UI를 손쉽게 구현할 수 있습니다.